Step 1: Choosing Solar Cells
Solar cell type is different, its output power as well as voltage will be slightly different. Take monocrystalline solar cell as an example, a whole piece is 0.5V, no matter how many pieces you cut it into, after you cut it, the small solar cell is also 0.5V. it can be arranged in series to get any output voltage needed in multiples of 0.5V, if you need a solar panel with 18V, which is made up of 36 small solar cells connected in series, it will be 36*0.5=18V.
The power of a solar cell can be calculated based on its area: length*width*0.1*conversion efficiency (it will be slightly different for different types of cells), suppose the calculation shows that a solar cell is 4W, then to make a 36W solar panel, you will need 36/4=9 pieces, then you need to prepare 9 pieces of the same specifications of solar cells.
Step 2: Planning the layout, solar cell arrangement
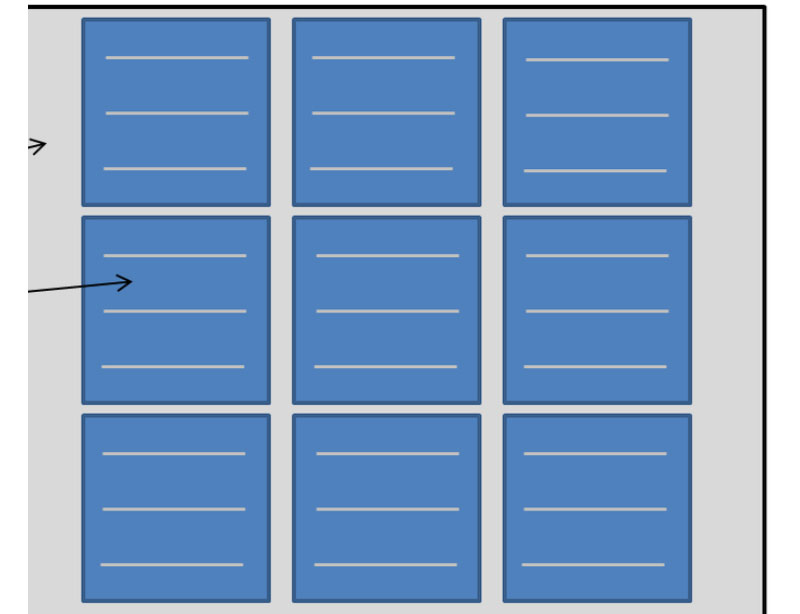
If the glass is bought beforehand, without prior calculation, it needs to be arranged according to the glass. Tandem is usually 1*36, 2*18, 4*9, generally not recommended 1*36 rows, 2*18 rows of overall solar panels are too narrow, usually choose 4*9 rows.
Step 3: Connect the solar cells in series
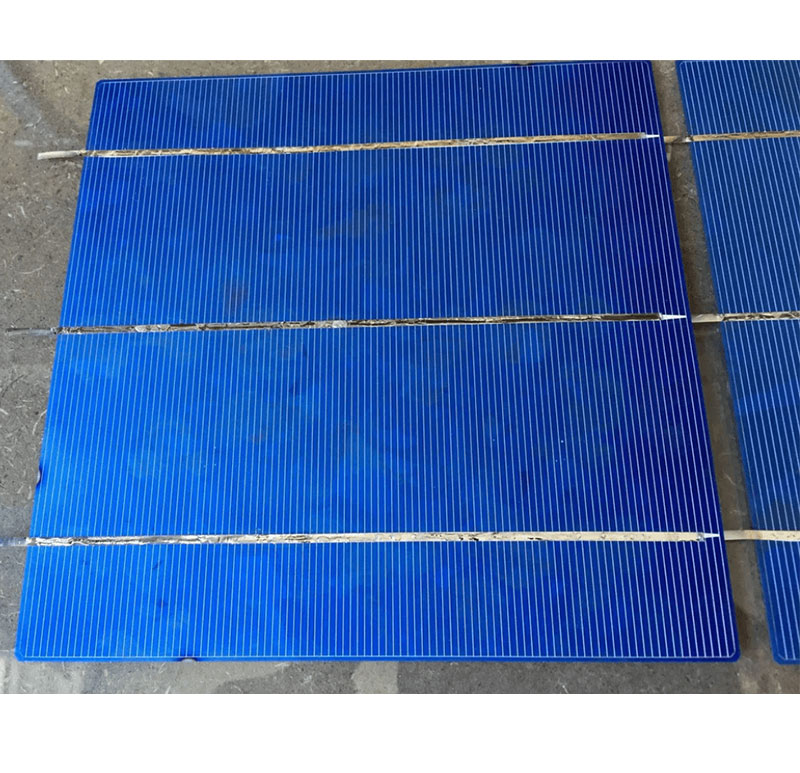
First mark the positive and negative terminals on the surface of the solar cell wafers with a marker, then stick flux on them with copper tape and solder them one by one with a soldering iron. Be careful not to leave the soldering iron in one area for too long as it will overheat and damage the solar cell wafers.

Step 4: Connecting the Bus
Solder the connecting wires from the back of one solar cell to the front of the neighboring solar cell until each row is completed. Then use the bus to connect the lines. When connecting lines, they also need to connect the positive terminal to the negative terminal, so adjacent lines should run in opposite directions.